

Here are three automations worth running after every campaign, and what it quietly costs you when you don't:
- Suppress out-of-office leads until they're actually back, so you stop burning sends on someone reading your fifth email from a beach chair.
- Create a replacement lead when a contact leaves their company, so a departure turns into a new relationship instead of a dead address.
- Log the reason behind every unsubscribe, so opt-outs leave an auditable trail instead of vanishing the second someone clicks.
None of this is hypothetical, it's already sitting in your inbox. A single 10,000-reply campaign can break down to roughly 9,600 out-of-office auto-replies, 92 unsubscribes, and just 8 emails that actually matter. (We broke those numbers down here.) Every reply you handle badly leaks pipeline, corrupts your data, or leaves you exposed on compliance, on every send, at scale. The teams that automate this pull ahead on data quality and speed-to-lead; the ones that don't keep paying for it without noticing.
Email Reply Management (ERM) is how you flip that: it reads every reply, categorizes it, and either forwards it to the right teammate or runs the next action itself, as much or as little automation as you want.
Each example below uses a different MAP on purpose: Marketo, then HubSpot, then Salesforce. It's the same three-part pipeline every time (categorization → extraction → actions), so every pattern works in all three; don't skip one just because it isn't your MAP.
1. Suppress a lead based on how long they're out of office
Say you want to suppress a lead who'll be out of office longer than a set amount of time. Emailing someone five more times while they're three weeks into a vacation doesn't nurture them, it just stacks up unread while they're off chasing tacos on a beach. Pause the sequence until they're back instead. And if they left a return date, you can even greet them with a "welcome back" when they return, a far warmer touch than another ignored send.
ERM handles this cleanly, and it's a great example because it uses all three pieces of the pipeline: categorization, data extraction, and actions.
Step 1. Categorize the reply as Out of Office
This category ships out of the box with allGood, but you're free to extend the prompt.
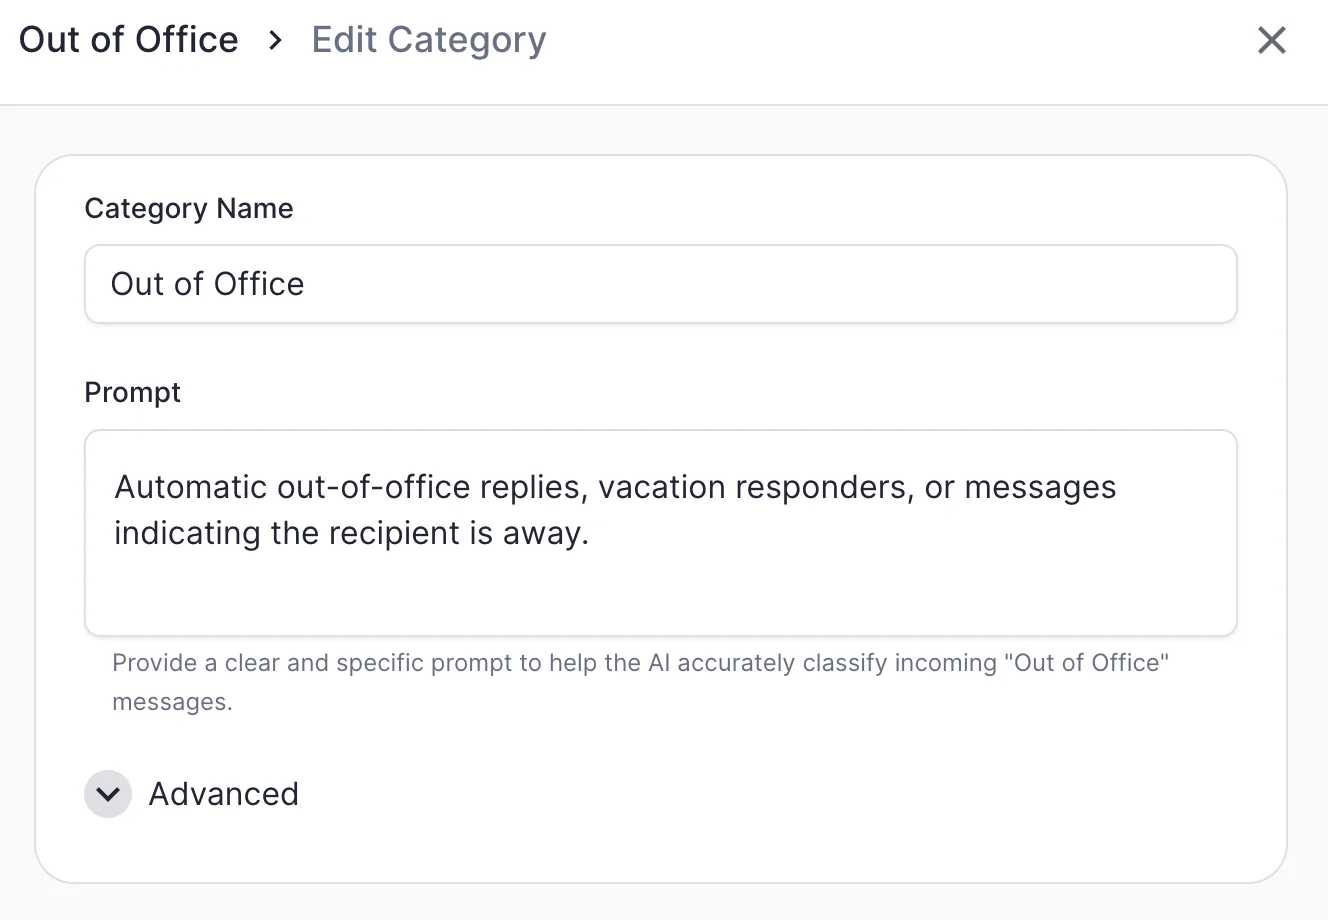
Category: Out of Office
Automatic out-of-office replies, vacation responders, or messages
indicating the recipient is away.
Step 2: Extract the return date
Pull the return date out of the reply, when the sender includes one in a usable format.
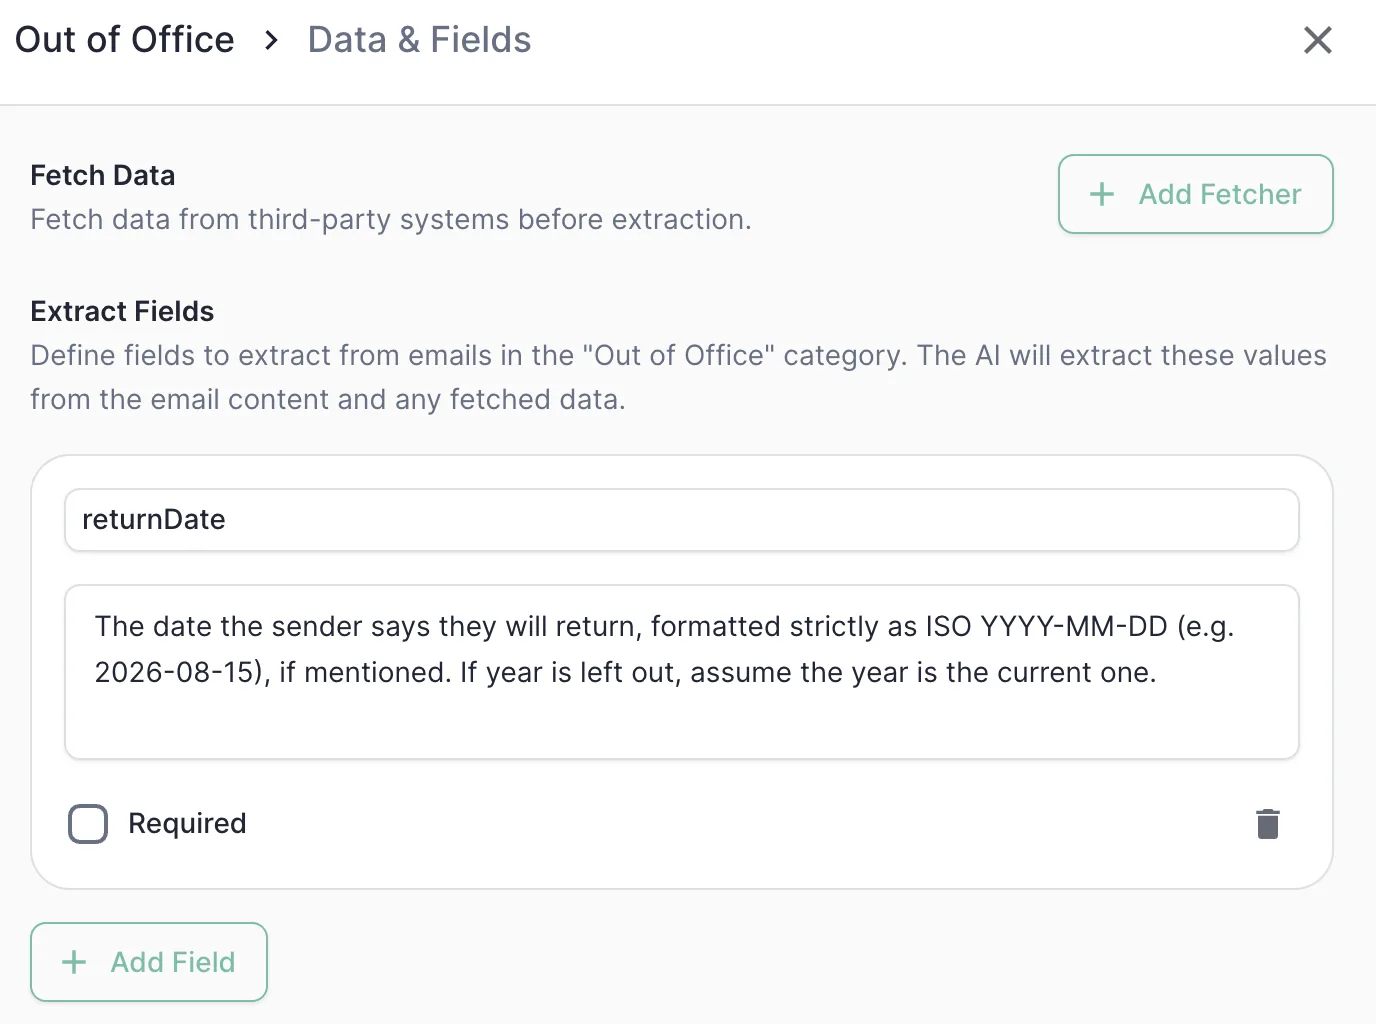
Field: returnDate
The date the sender says they will return, formatted strictly as
ISO YYYY-MM-DD (e.g. 2026-08-15), if mentioned. If the year is left
out, assume the year is the current one.
Step 3. Suppress the lead if the return date is far enough out
This is the most involved step, and the one place you'll add a little logic. This example runs in Marketo: you only suppress the lead if the return date is past a set threshold, two weeks out, here.
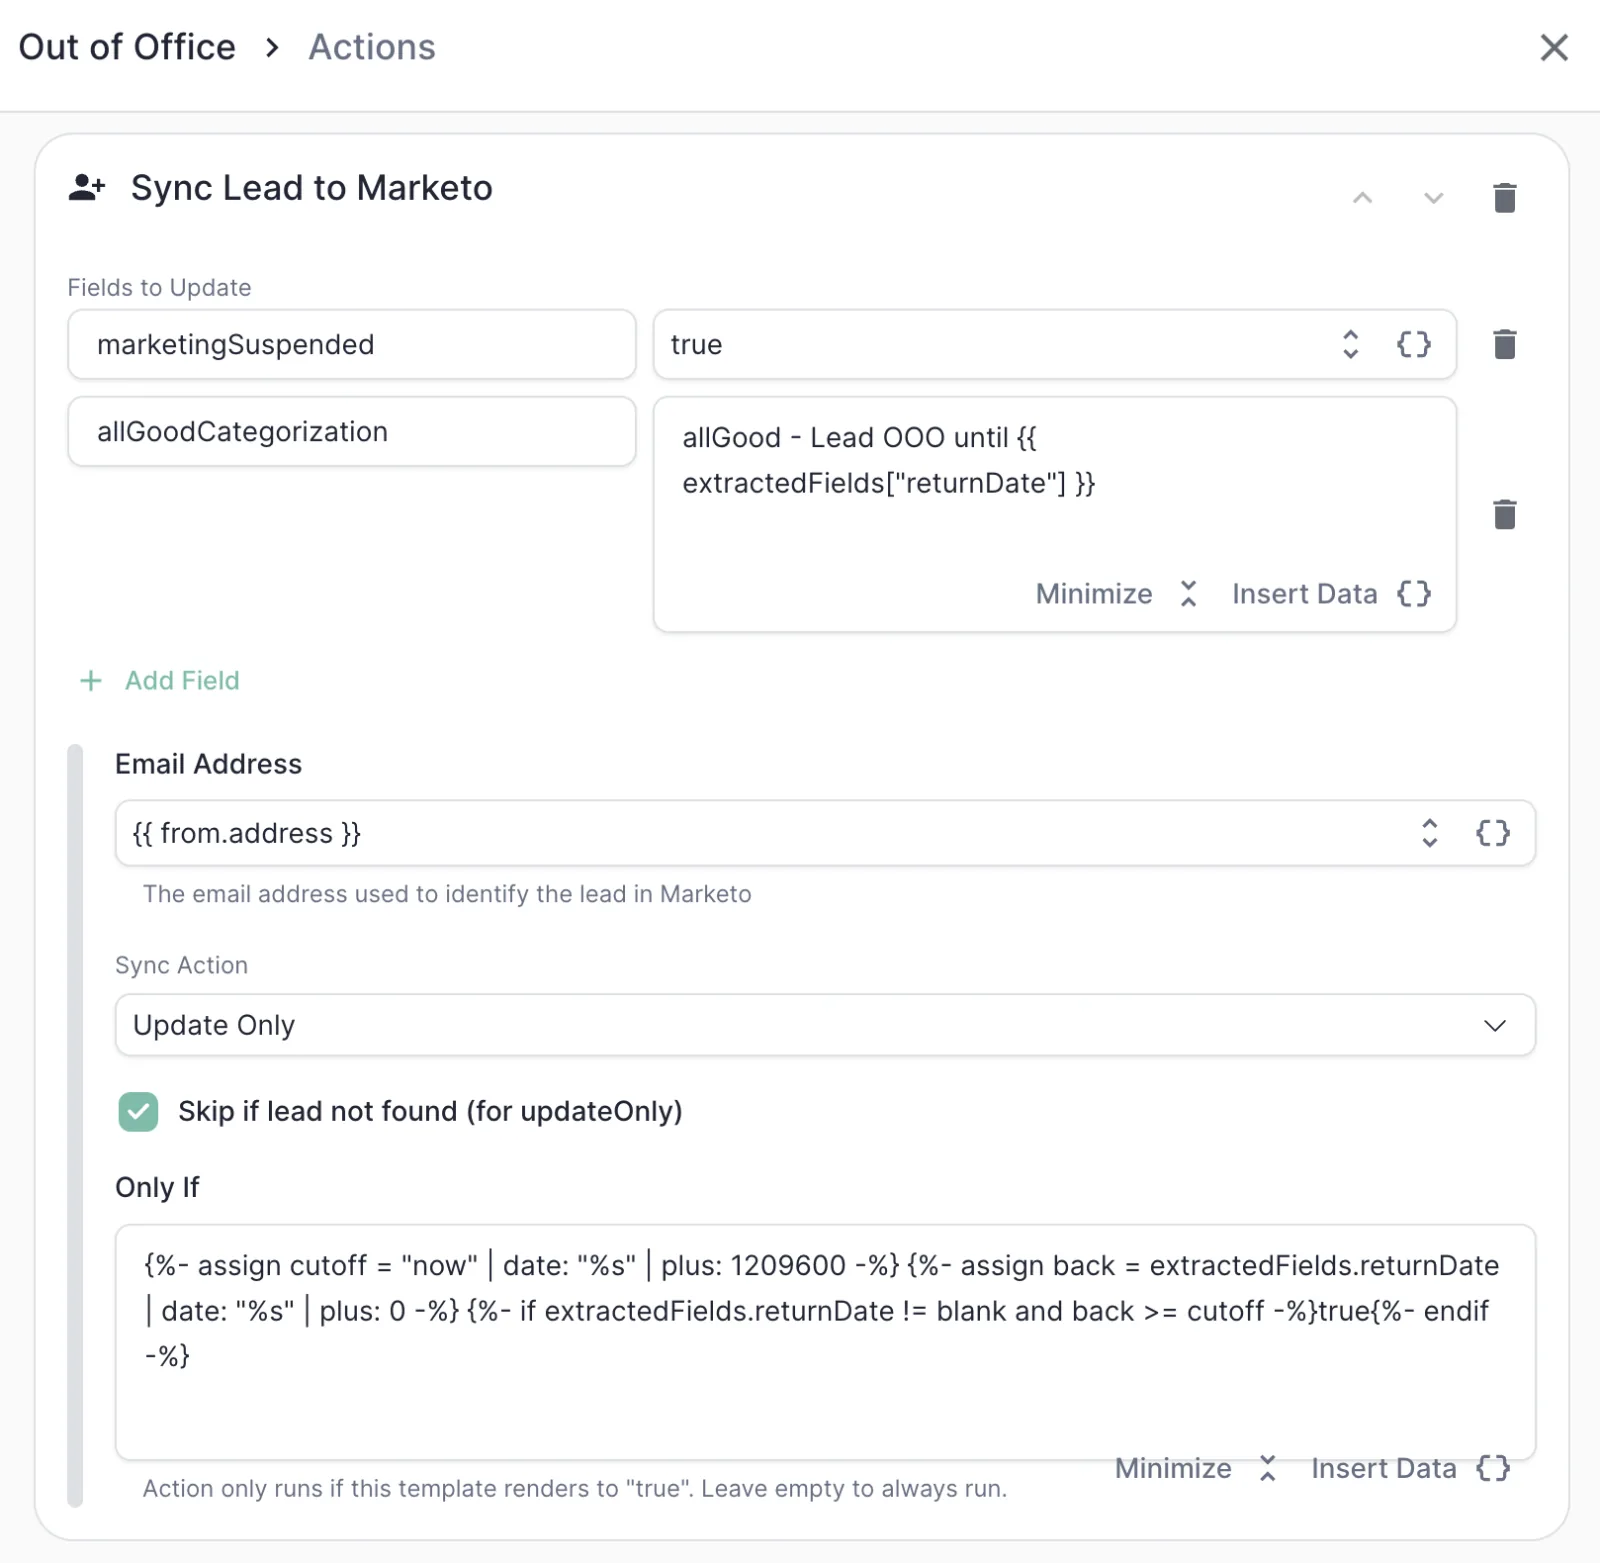
Action: Sync Lead
marketingSuspended = true
allGoodCategorization = allGood - Lead OOO until {{ extractedFields["returnDate"] }}
Email Address: {{ from.address }}
Only if:
{%- assign cutoff = "now" | date: "%s" | plus: 1209600 -%}
{%- assign back = extractedFields.returnDate | date: "%s" | plus: 0 -%}
{%- if extractedFields.returnDate != blank and back >= cutoff -%}true{%- endif -%}
A quick note on reading these blocks: the = lines are the fields ERM writes to a record. Email Address is different: it's whose record the action runs on, not a field you set. It defaults to the sender ({{ from.address }}), and on sync actions it's tucked under Advanced, so you'll usually leave it alone: change it only to target someone else, like the new contact in Example 2.
And don't let the Liquid scare you off, copy it in as-is and change one number (1209600 is just two weeks expressed in seconds). You never have to write this from scratch.
2. Create a new lead when an old one leaves the company
When a lead leaves their company, their auto-reply often names a replacement contact. ERM can create that new lead in your MAP automatically, but only once you actually have enough information to do it.
Step 1. Categorize the reply as Left Company
This one also ships out of the box, but feel free to extend it.
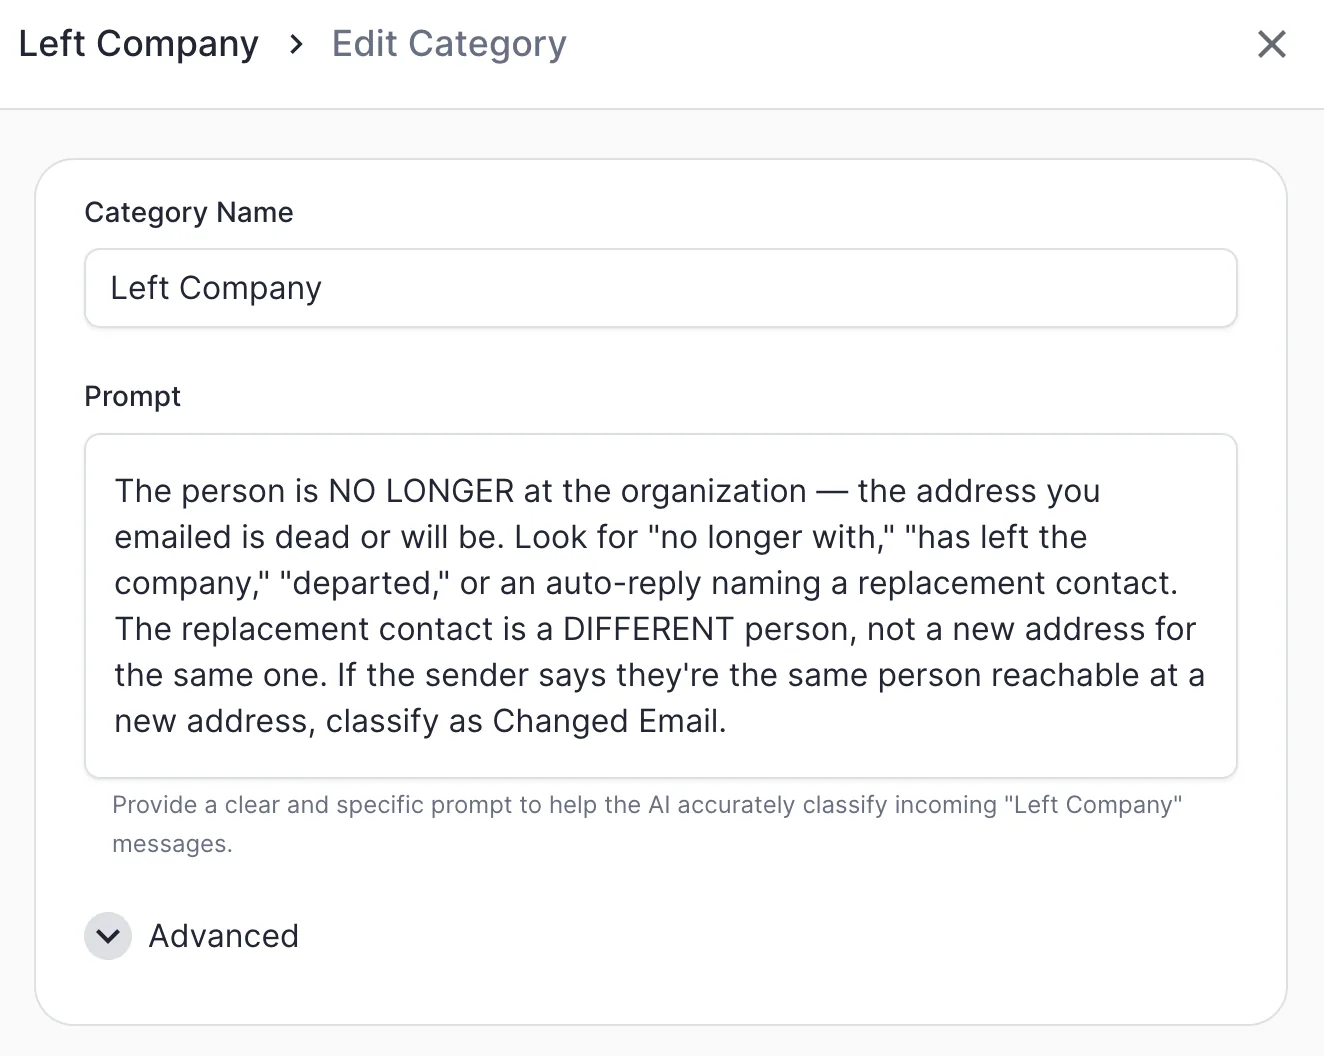
Category: Left Company
The person is NO LONGER at the organization, the address you
emailed is dead or will be. Look for "no longer with," "has left
the company," "departed," or an auto-reply naming a replacement
contact. The replacement contact is a DIFFERENT person, not a new
address for the same one. If the sender says they're the same
person reachable at a new address, classify as Changed Email
instead.
Step 2: Fetch the old lead's company and extract the new contact's info
First, fetch the original lead's company from HubSpot. Then extract the replacement contact's name and email, if the old lead provided them.
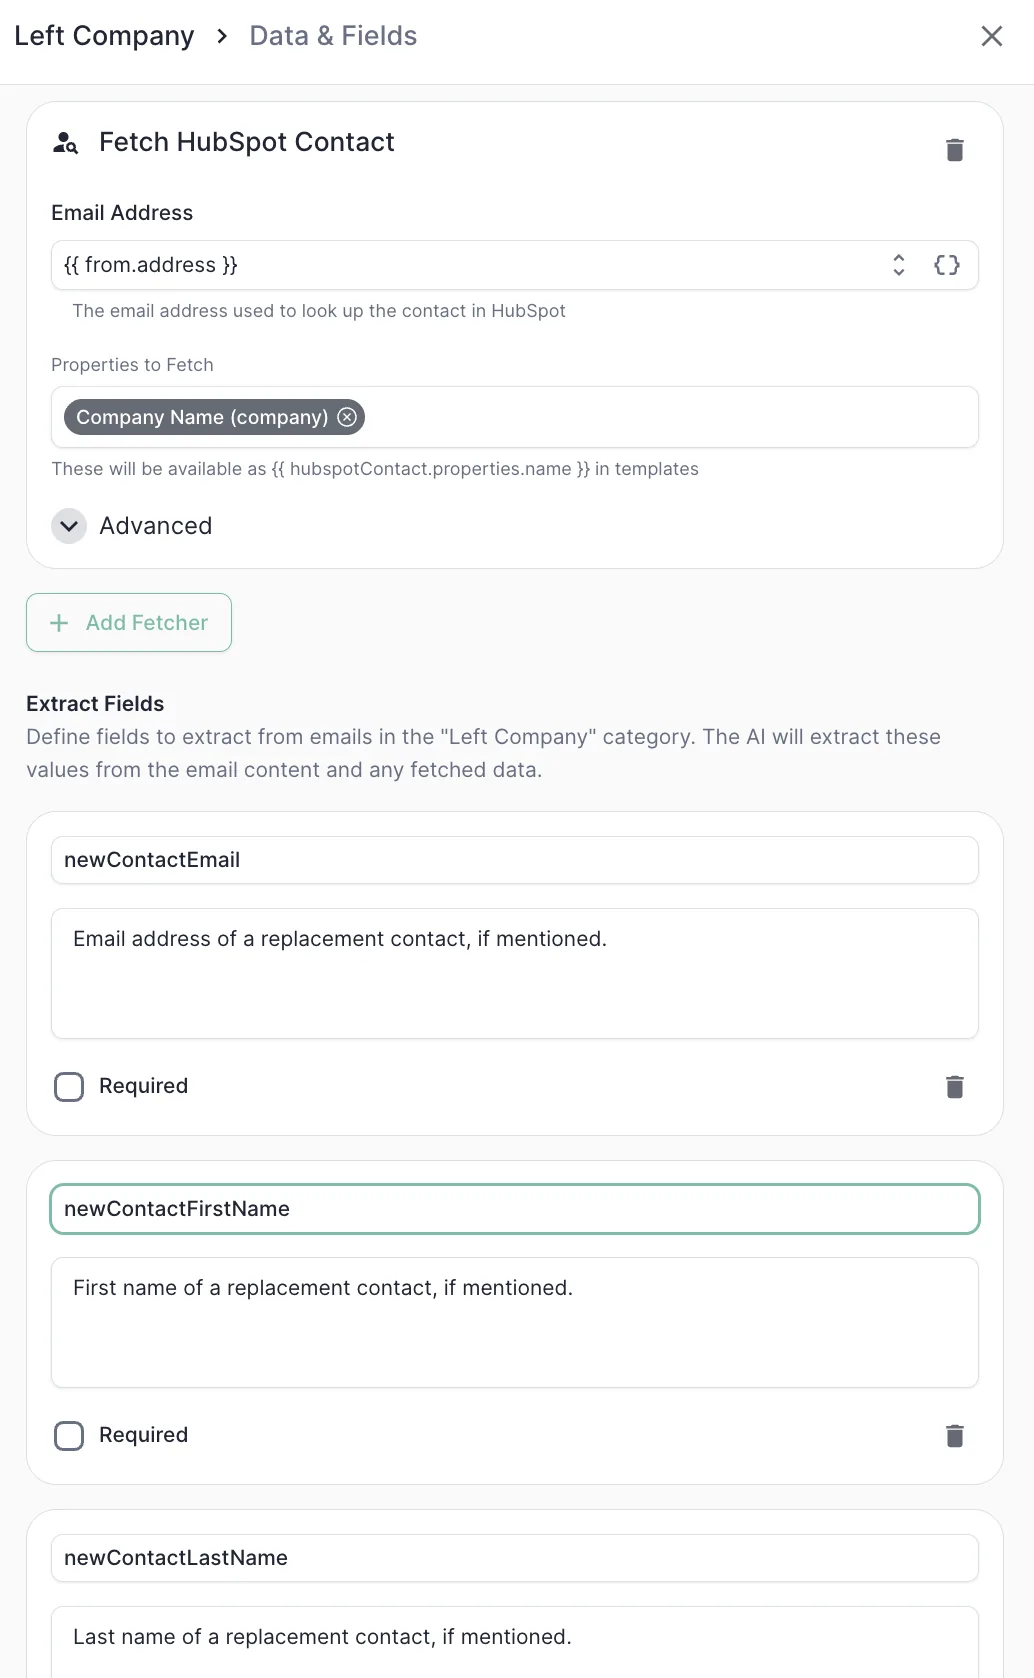
Field: newContactFirstName
First name of a replacement contact, if mentioned.

Field: newContactLastName
Last name of a replacement contact, if mentioned.

Field: newContactEmail
Email address of a replacement contact, if mentioned.
Step 3: Write the action
This example runs in HubSpot and chains three actions. First, unsubscribe the old contact and stamp the custom allgood_categorization field to record why they were removed. Then create the replacement contact (but only if you have their first name, last name, and email) copying the old lead's company across.
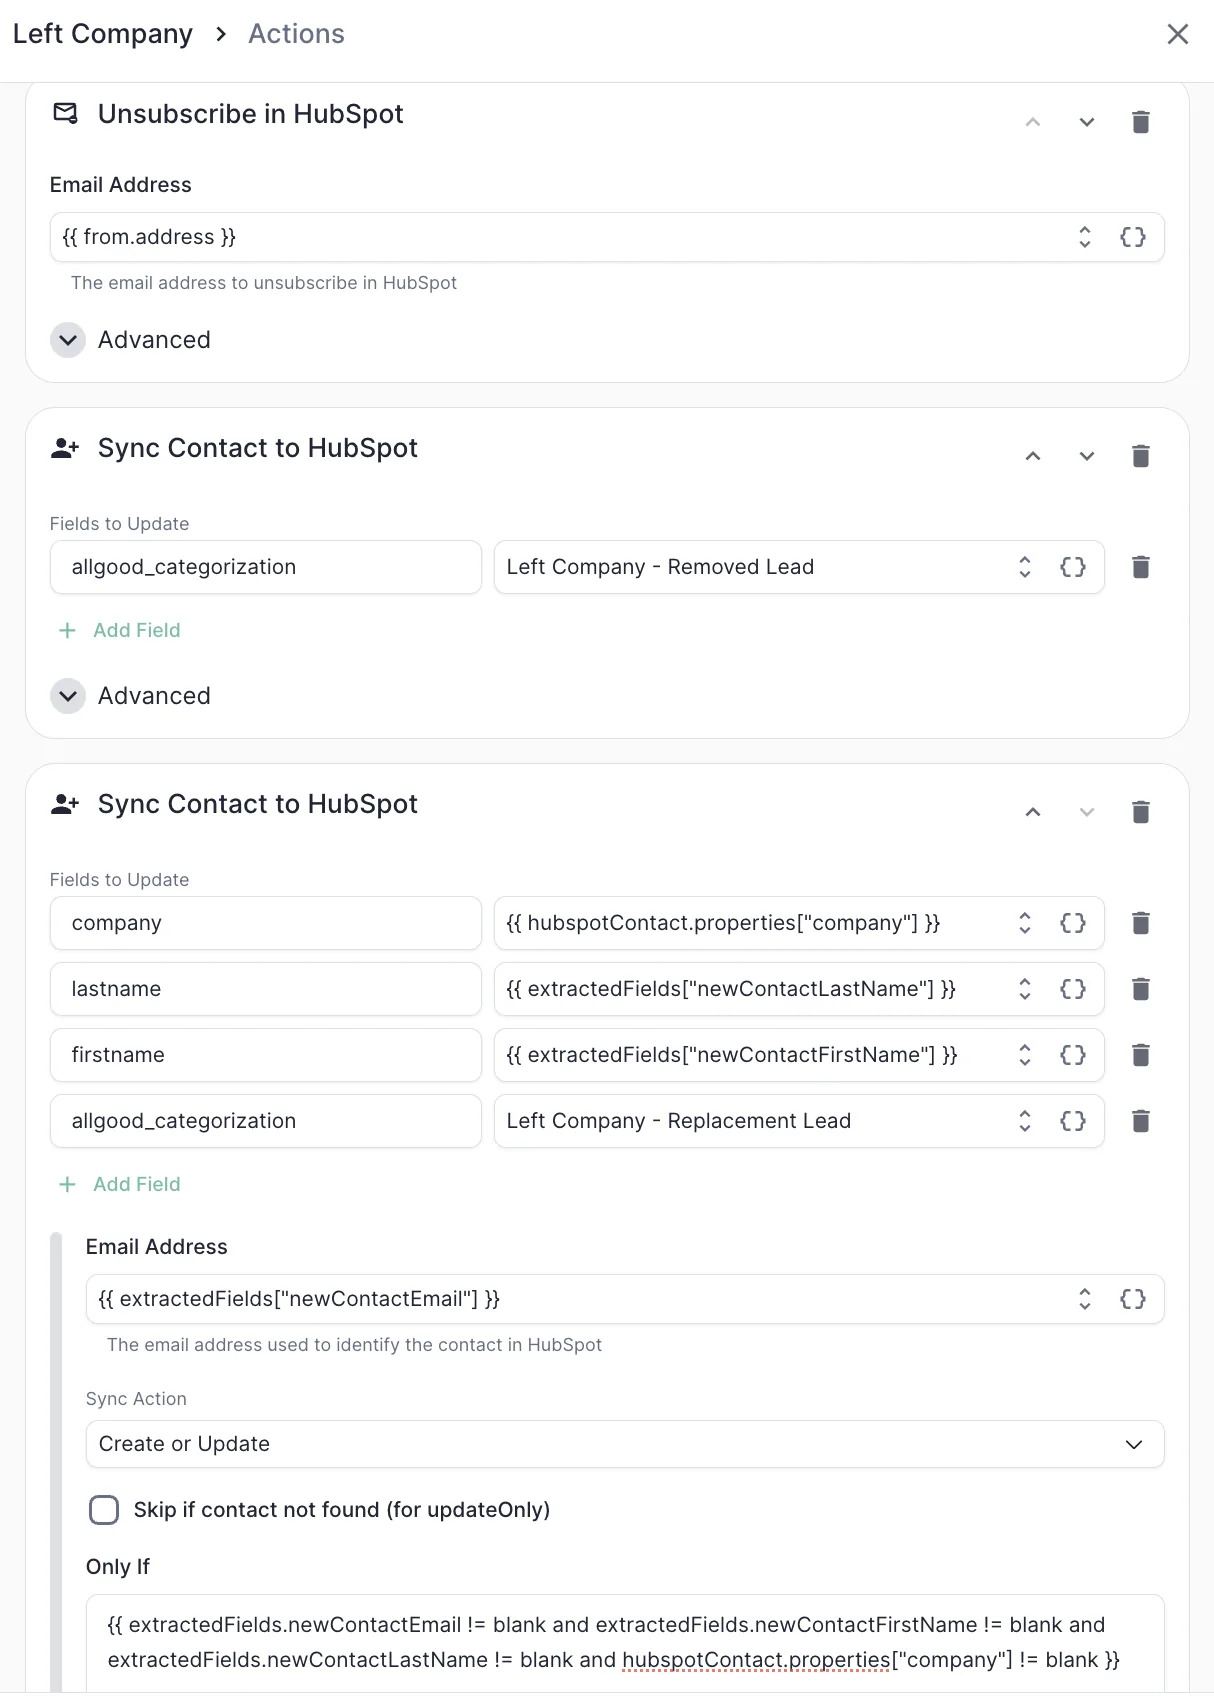
Action: Unsubscribe
Email Address: {{ from.address }}

Action: Sync Contact
allgood_categorization = Left Company - Removed Lead
Email Address: {{ from.address }}

Action: Sync Contact
firstname = {{ extractedFields["newContactFirstName"] }}
lastname = {{ extractedFields["newContactLastName"] }}
company = {{ hubspotContact.properties["company"] }}
allgood_categorization = Left Company - Replacement Lead
Email Address: {{ extractedFields["newContactEmail"] }}
Only if:
{{ extractedFields.newContactEmail != blank
   and extractedFields.newContactFirstName != blank
   and extractedFields.newContactLastName != blank
   and hubspotContact.properties["company"] != blank }}
3. Unsubscribe a contact with the reason saved for later
This is by far the simplest use case here, but it's powerful for a different reason: it builds a human-readable audit trail. When a lead unsubscribes, you can opt them out in your MAP and write the reason to a custom field, so your ops team can look back later and understand exactly why it happened.
Step 1. Categorize the reply as Unsubscribe
Another out-of-the-box category, extend as needed.
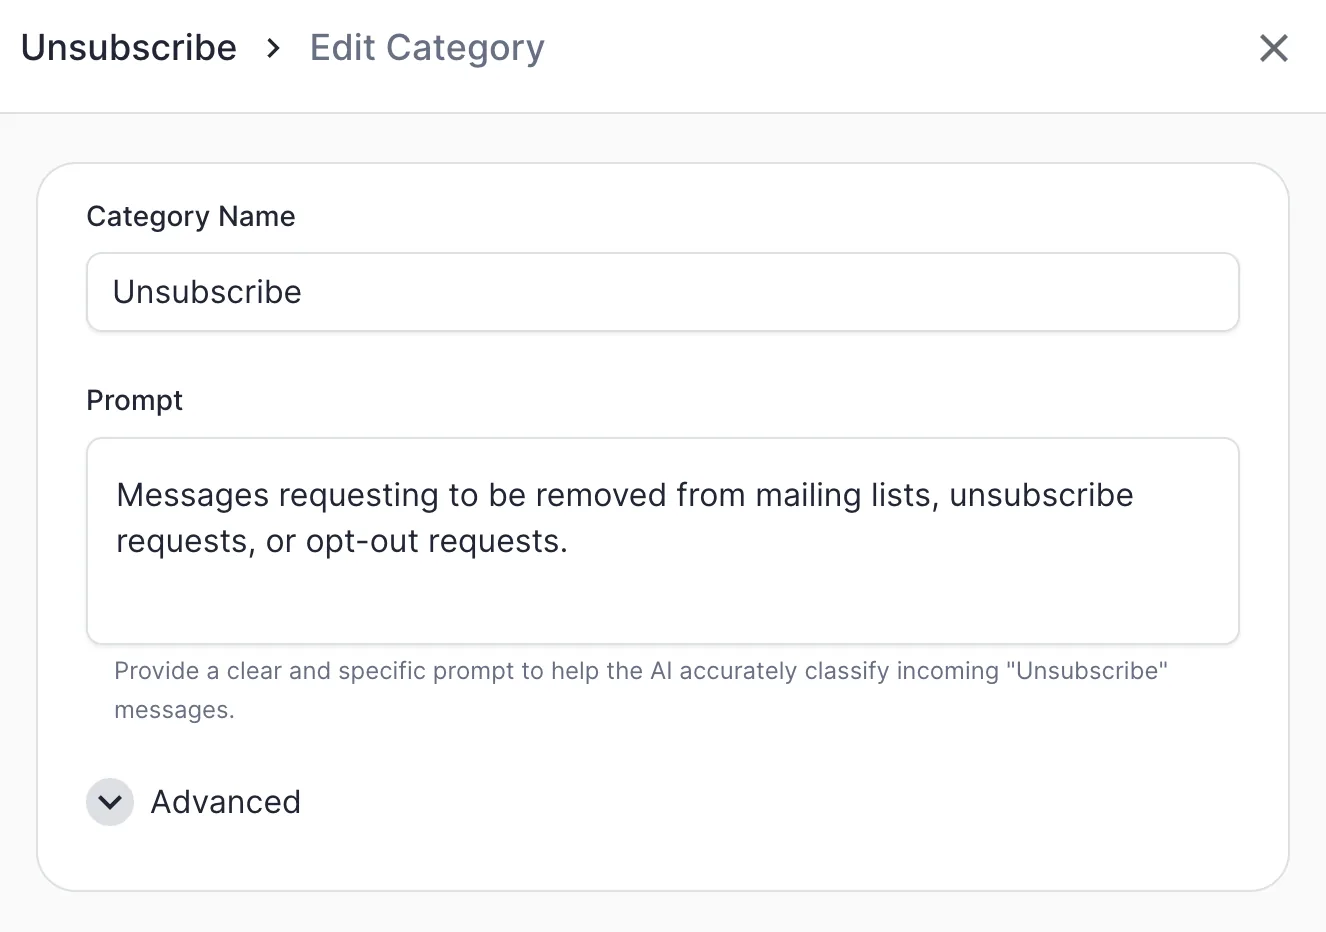
Category: Unsubscribe
Messages requesting to be removed from mailing lists, unsubscribe
requests, or opt-out requests.
Step 2: Unsubscribe the lead and log why
Opt the lead out in your MAP, then write the reason to a custom field. This example runs in Salesforce.
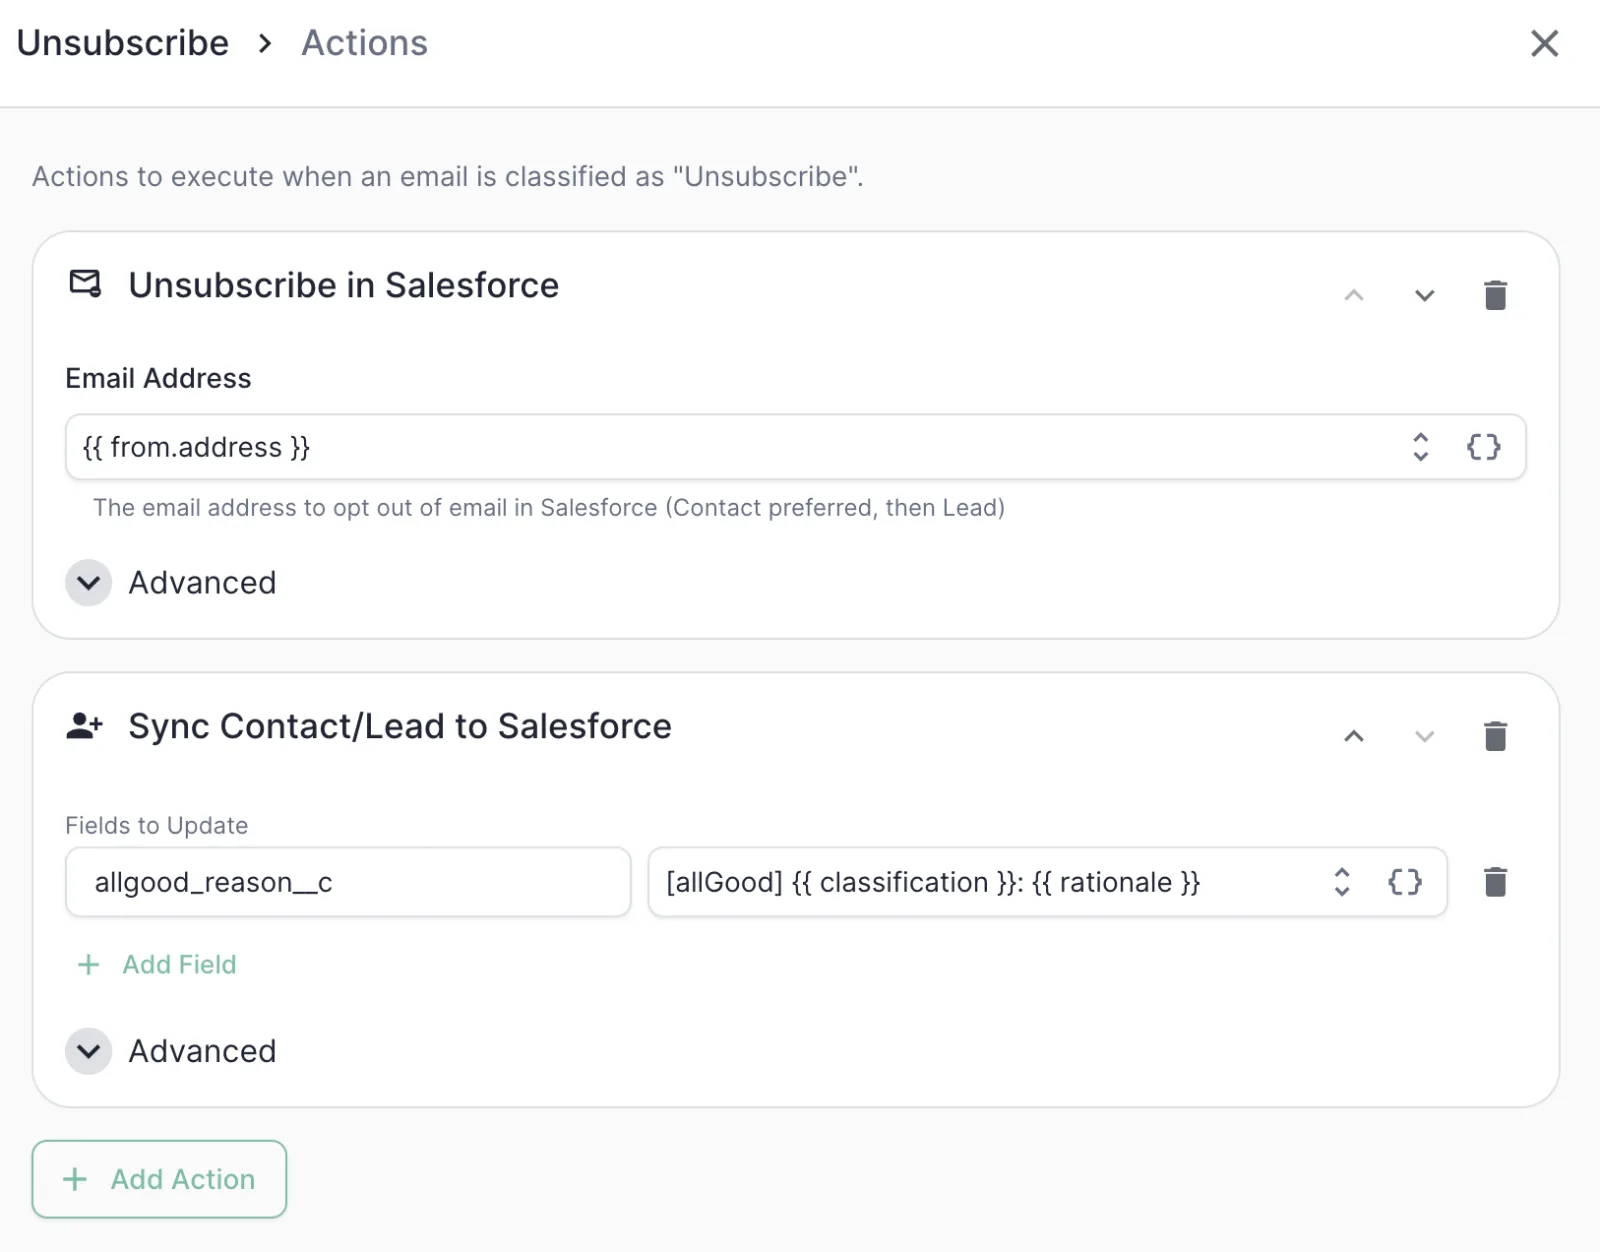
Action: Unsubscribe
Email Address: {{ from.address }}

Action: Sync Lead
allgood_reason__c = [allGood] {{ classification }}: {{ rationale }}
Email Address: {{ from.address }}
Wrapping up
Each of these examples is meant to spark ideas, not box you in: mix and match categorization, extraction, and actions however fits the way your team actually works. And if you want your categories classifying exactly the way you intend before you build actions on top of them, start with our guide on writing category definitions.
Ready to build one? If you're already in allGood, the ERM documentation walks through categories, extraction, and actions step by step, copy the configs above straight in.
Not on allGood yet? Book a demo and we'll build your first automation with you.